In this tutorial, we are going to connect with amazon redshift with the help of Mulesoft’s Anypoint Studio. We will fetch the data from a table using a simple SQL query. Follow the step by step guide for the same.
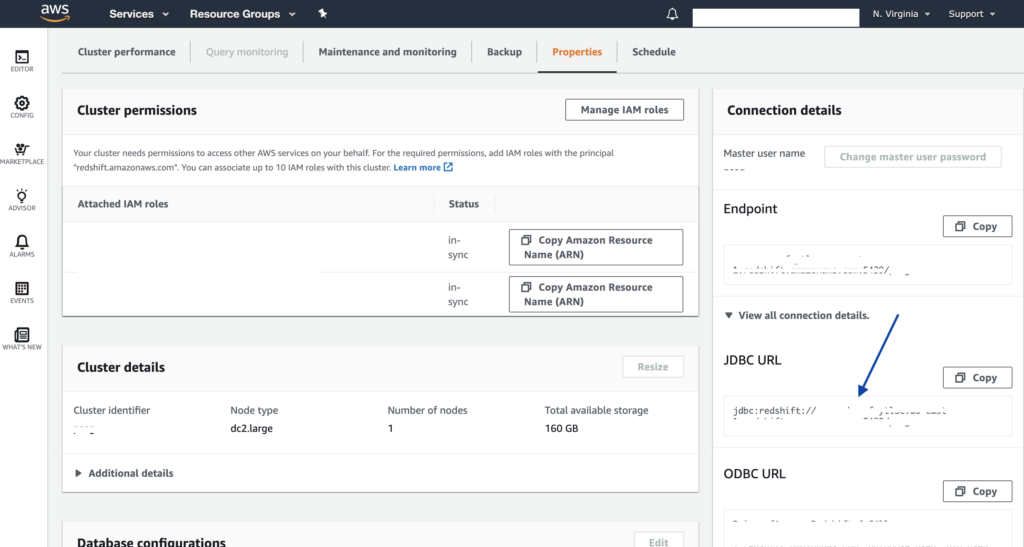
Step 1: Get the JDBC connection String from the redshift cluster page. There is a section called Connection Details. See the below screenshot for reference.
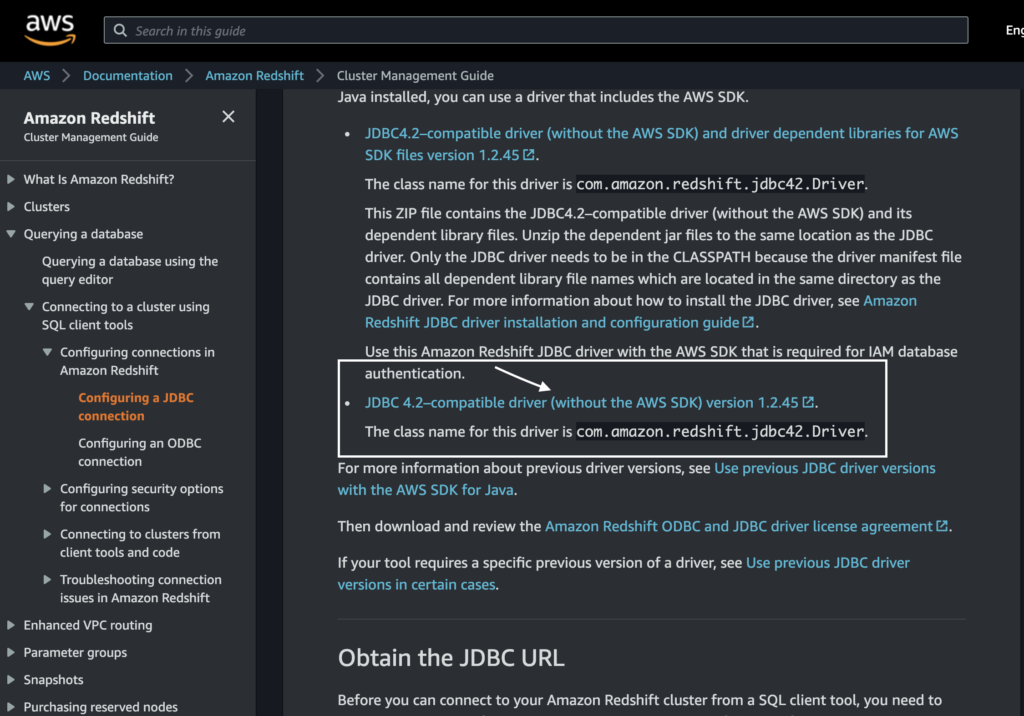
Step 2: Download the Amazon Redshift JDBC driver from below link and copy the Class name give with the driver.
https://docs.aws.amazon.com/redshift/latest/mgmt/configure-jdbc-connection.html#download-jdbc-driver
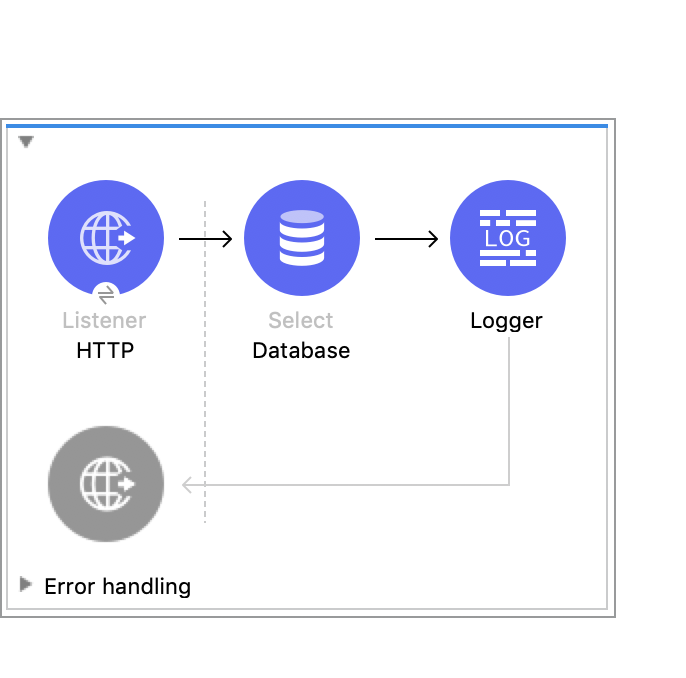
Step 3: Now let’s create a new mule soft project in the anypoint studio and drag and drop http listener, database select, logger components from Mule Palette to message flow and create a below flow.
Step 4: Now we are going to configure the properties of each component.
First, click on the HTTP Listener component and Fill Display name, in my case I filled it with “HTTP”. Then fill the value of path with “/”.
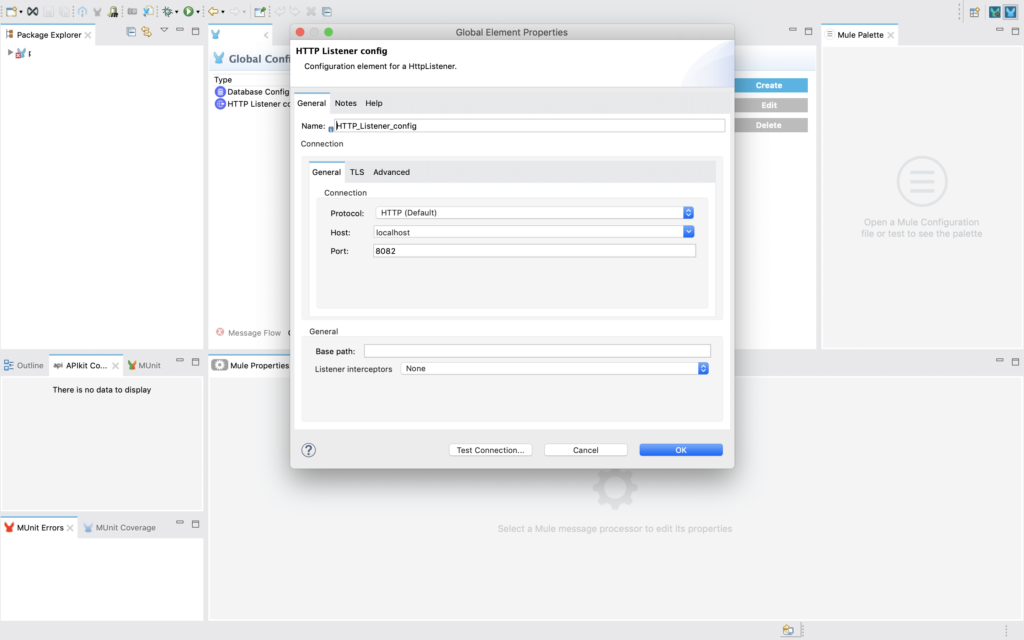
Inside connection configuration, click on the edit icon and inside General Tab, Enter name “HTTP_Listener_config”. Select Protocol HTTP, Host with localhost, and Port 8082. Click on the test connection and after successful connection message close this window.

Select the MIME type inside the properties of HTTP Listener component and update the properties as per below image.
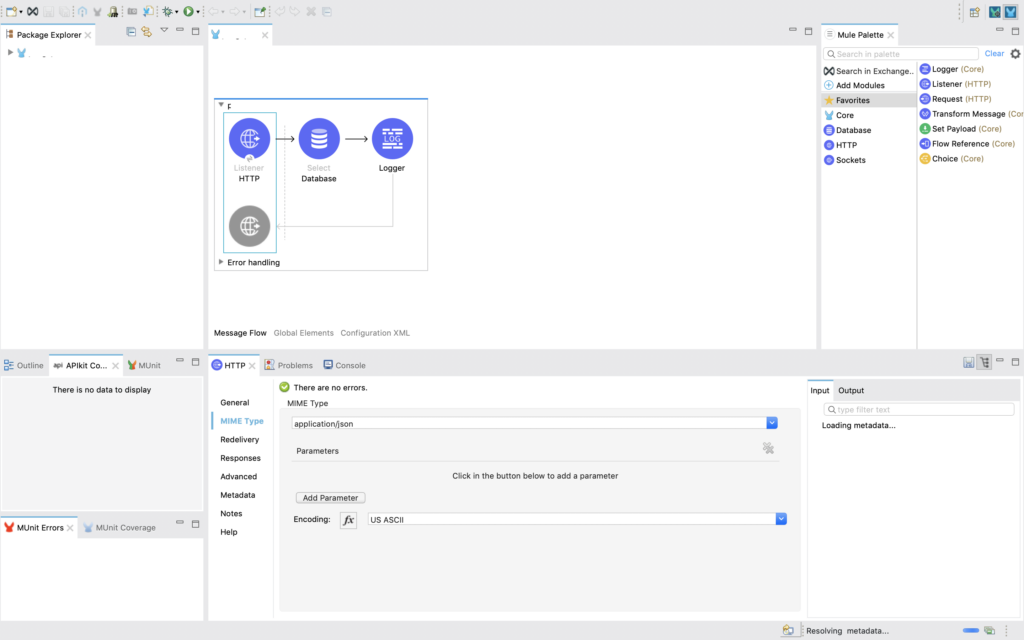
Select the Responses tab inside the properties of HTTP Listener component and update the properties as per below image.
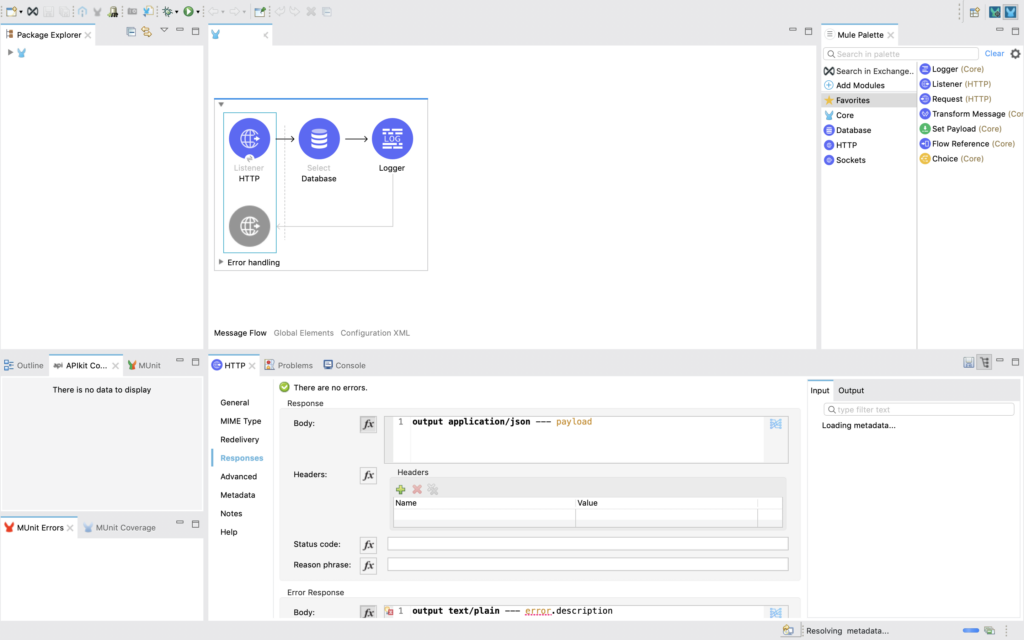
Step 5: Click on the Database Select component and update the setting based on the below image. Update the display Name and Write SQL Query Text.
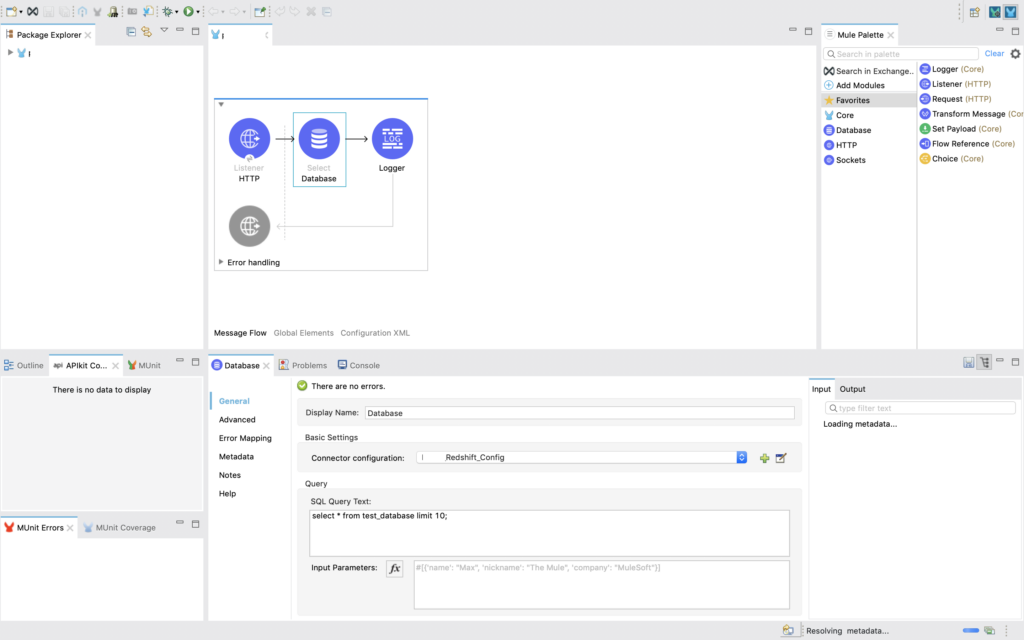
Click on the add icon to add the connection configuration. First, select the connection as “Generic Connection” and inside the General Tab, click on the configure button to select the Redshift JDBC Driver file that you downloaded in Step 2 and click on Ok to close the dialogue box.

In the database config window, update the JDBC connection string inside the URL input field and update the Driver class name that you will get from Step 2 and the user name and password of your redshift database.
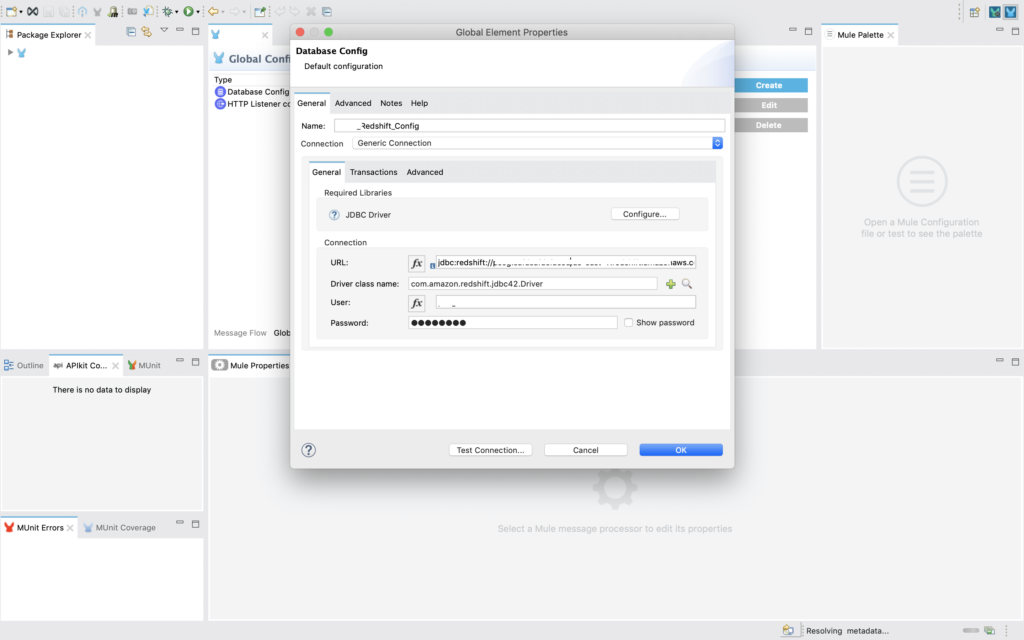
Step 6: Run your mulesoft project and open http://localhost:8082/ URL in your favourite browser. You can see the JSON response on the screen.
I hope it will work for you and if you face any issue, feel free to comment.

Leave a Reply